When you think about your orchids, it's vital to understand their specific needs to prevent disasters before they begin. You might not realize how factors like light, water, and humidity can make or break your plants. By taking a closer look at these elements and being proactive, you can maintain a healthy environment that supports vibrant growth. But what happens when you notice signs of stress or pests? The key lies in knowing how to respond effectively. Let's explore the essential steps that can safeguard your orchids from unexpected setbacks.
Key Takeaways
- Identify your orchid species to tailor care for specific light, water, and humidity needs, preventing stress-related issues.
- Ensure adequate light conditions by placing orchids in bright, indirect light to avoid leaf scorch and stunted growth.
- Maintain proper watering practices by checking potting medium moisture and watering thoroughly to prevent root rot.
- Monitor humidity levels, keeping them between 40% and 70%, to avoid dry leaves or excessive moisture that can harm roots.
- Regularly inspect for pests and signs of stress, allowing for early intervention and adjustments to care routines.
Understand Your Orchid Species
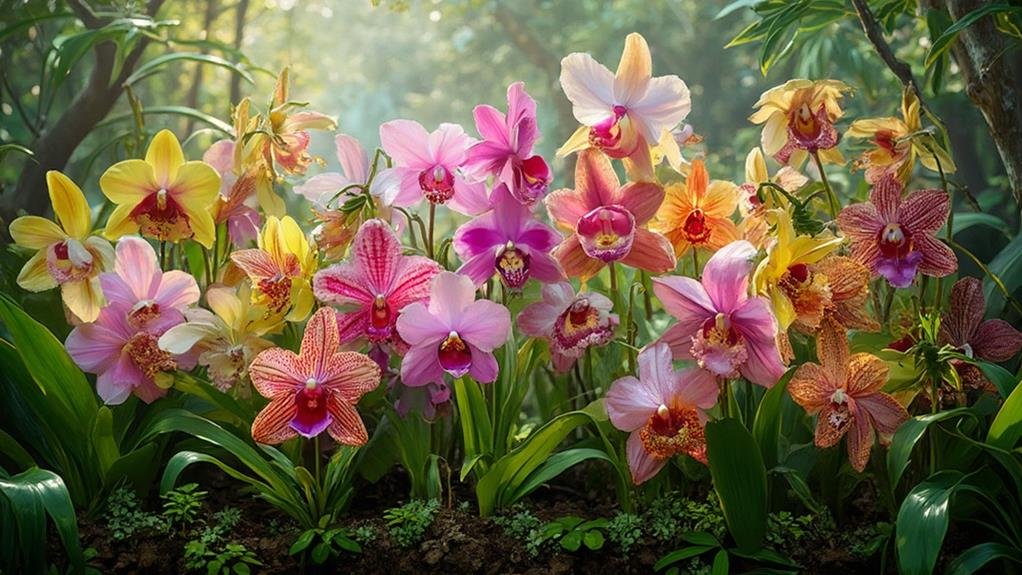
Understanding your orchid species is crucial for ensuring its health and longevity. Each type of orchid has specific needs, and knowing these will help you provide the best care. Start by identifying whether your orchid is a Phalaenopsis, Dendrobium, or Cattleya, among others. Each species has unique preferences for light, water, and humidity.
Pay attention to your orchid's natural habitat. For example, some orchids thrive in bright, indirect sunlight, while others prefer shadier spots. This knowledge will guide you in positioning your plant effectively in your home.
Watering habits also vary; some orchids like to dry out between waterings, while others need consistent moisture. Understanding these differences allows you to avoid common mistakes, like overwatering, which can lead to root rot.
Lastly, familiarize yourself with the signs of stress in your orchid. Yellowing leaves, wilting flowers, or stunted growth can all indicate that something's amiss.
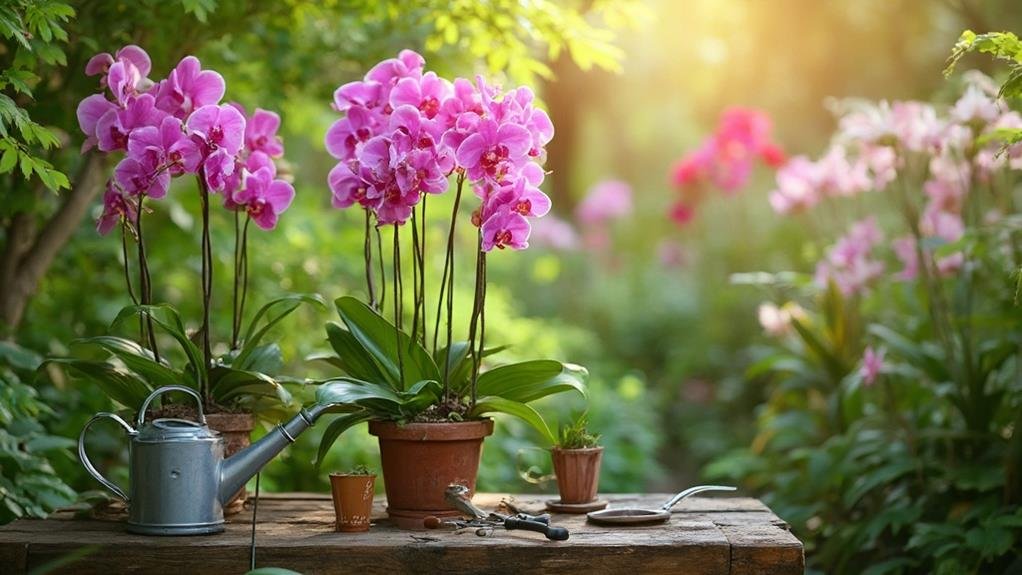
Choose the Right Potting Medium
Choosing the right potting medium is just as important as knowing your orchid species. The medium you select plays a vital role in your orchid's health and growth. Different orchids thrive in different types of media, so understanding their needs will set you up for success.
For many orchids, a loose, well-draining mix is fundamental. Bark chips, sphagnum moss, and perlite are popular choices, as they allow air circulation around the roots while retaining some moisture. If you're caring for an epiphytic orchid, like a Phalaenopsis, a mix of pine bark and perlite works wonders.
On the other hand, terrestrial orchids often prefer a denser medium that retains moisture, such as a mix of potting soil and peat. Keep in mind that you should avoid standard potting soil, as it can hold too much water and suffocate your orchid's roots.
Lastly, don't forget to refresh your potting medium every couple of years. This helps prevent compaction and guarantees your orchids get the nutrients they need.
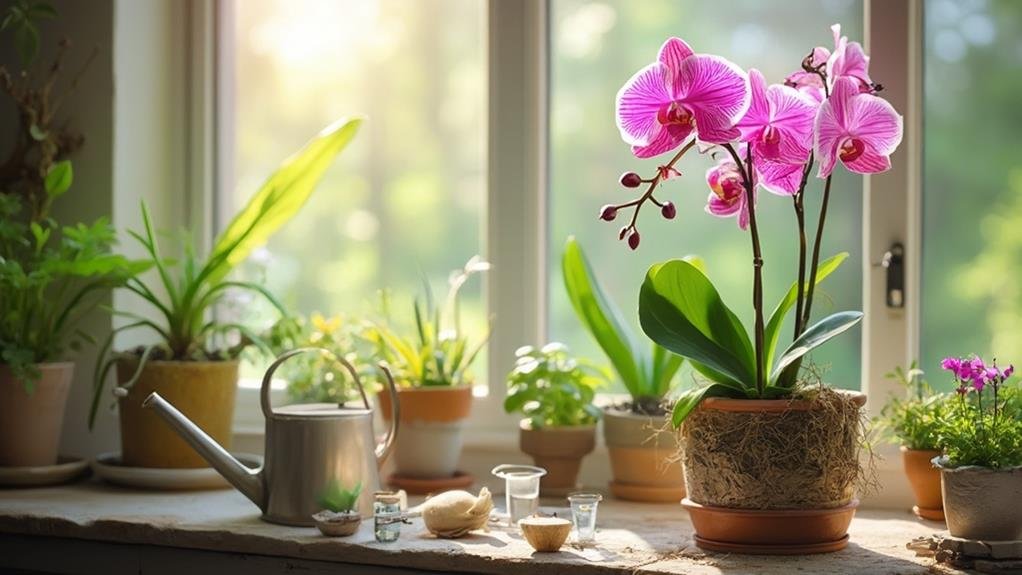
Provide Adequate Light Conditions

Light is essential for your orchids' growth and flowering. The right amount of light helps them thrive and showcases their beauty for everyone to enjoy.

Orchids generally prefer bright, indirect light. If you're placing them near a window, consider using sheer curtains to diffuse the sunlight. Direct sunlight can scorch their leaves, so it's best to avoid that.
To guarantee your orchids receive adequate light, observe their leaves. If they're dark green, your orchids might be craving more light. A healthy orchid usually has bright, vibrant leaves. If you notice yellowing leaves, it could signal that your plant is getting too much light.
Different types of orchids have varying light requirements, so do a little research on the specific species you own. You might find that some prefer shadier spots than others.
If natural light is limited, consider investing in grow lights. These can provide the necessary light spectrum for your orchids to flourish.
Maintain Proper Watering Practices
When it comes to watering your orchids, striking the right balance is essential for their health and vigor. Overwatering can lead to root rot, while underwatering can cause stress and hinder growth.
Start by checking the potting medium; it should be slightly dry before you water again. A good rule of thumb is to stick your finger about an inch into the mix—if it feels dry, it's time to water.
When you do water, make sure you're doing it thoroughly. Water until it drains out of the bottom of the pot, ensuring the roots get the moisture they need.
Be mindful of the time of day you water; early mornings are best, allowing the leaves to dry and reducing the risk of fungal diseases.
Consider the type of orchid you have, as different species may have unique watering needs. For example, Phalaenopsis orchids prefer a bit more moisture compared to Cattleyas.
Use distilled or rainwater if possible, as tap water can contain chemicals that might harm your orchids. By tuning into your orchids' needs, you can help them thrive and bring joy to those you serve.
Monitor Humidity Levels
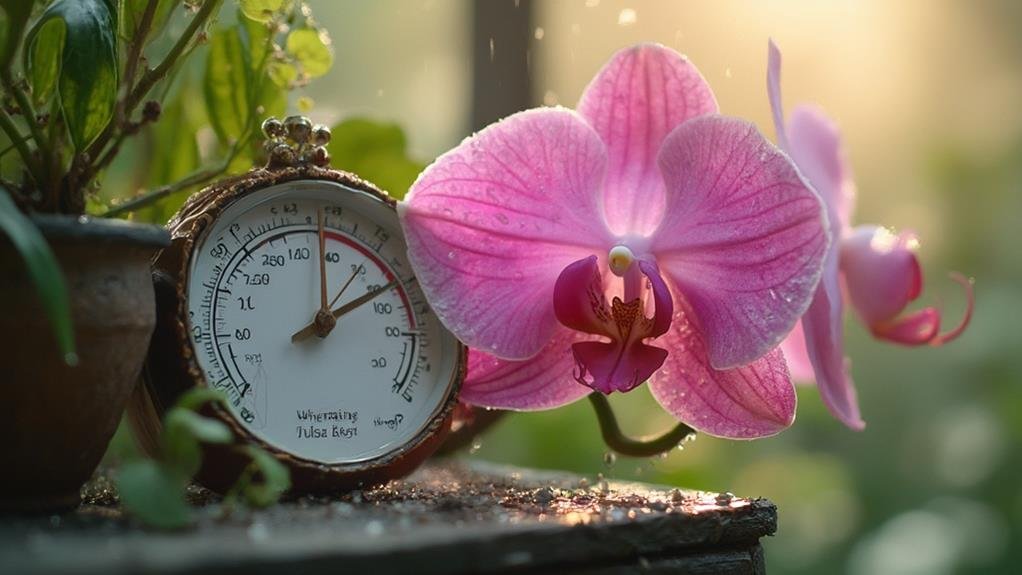
To keep your orchids thriving, you need to monitor humidity levels closely.
Ideally, humidity should stay between 40% and 60% for ideal growth.
Using tools like hygrometers can help you measure and maintain the right conditions.
Ideal Humidity Range
Maintaining the ideal humidity range is essential for the health of your orchids. Orchids thrive in environments with humidity levels between 40% and 70%. If you want your beautiful blooms to flourish, you'll need to guarantee they're kept within this range.
Too little humidity can lead to dry leaves and stunted growth, while too much can cause root rot and fungal issues.
To achieve the right humidity, consider the environment where your orchids are kept. If you live in a dry climate, you might need to use a humidifier or place your orchids on a tray filled with water and pebbles. Grouping your plants together can also create a microclimate that retains moisture better.
Pay attention to the signs your orchids give you; droopy leaves or brown tips can indicate humidity problems. It's all about finding that sweet spot where your orchids can thrive, and your dedication to their needs will shine through in their vibrant growth.
Humidity Measurement Tools
Monitoring humidity levels is essential for the well-being of your orchids, and using the right tools can make all the difference. To effectively care for your plants, invest in a reliable hygrometer. These devices measure the humidity in your growing environment, ensuring your orchids thrive.
Digital hygrometers are particularly user-friendly. They provide precise readings and often display temperature, making it easier to monitor your orchids' needs. Look for models with a clear display and a range suitable for indoor gardening.
You can also find analog hygrometers, which are cost-effective and straightforward, though they may require occasional calibration for accuracy.
Another great option is a combined thermometer-hygrometer, which gives you both temperature and humidity readings in one device. This helps you quickly assess the overall conditions in your orchid space.
For more accurate results, consider placing multiple hygrometers in different areas of your growing space. This way, you can identify microclimates and adjust your watering and misting routines accordingly.
Ensure Good Air Circulation
Good air circulation is essential for your orchids' health, as it helps prevent mold and pests.
You'll want to think about where you place your plants to maximize airflow around them.
Consider using fans or positioning them near open windows to promote a fresh breeze.
Importance of Airflow
Proper airflow is vital for the health of your orchids, as it helps prevent issues like mold and root rot. When you guarantee good air circulation, you're creating a favorable environment for your plants to thrive.
Stagnant air can lead to excess moisture, which encourages fungal growth and can damage your orchids' roots. To promote healthy airflow, consider using fans or placing your orchids in locations where natural breezes can reach them.
Regularly checking for any obstructions, like dust or debris, is important; these can impede circulation and create unhealthy conditions. If you're using a greenhouse, ventilating it properly is key, especially during hot weather.
Additionally, when watering your orchids, be mindful to allow the media to dry out between waterings. This practice not only helps prevent root rot but also keeps the surrounding air dry, further promoting airflow.
Ideal Placement Tips
When it comes to guaranteeing your orchids thrive, the right placement can make all the difference. Start by choosing a location that promotes good air circulation. Orchids need fresh air to prevent fungal diseases and encourage healthy growth.
Avoid placing them in cramped spaces; instead, opt for a spot where the air can flow freely around the plants. Consider positioning your orchids near a fan or an open window, but make sure they're not in direct drafts. Too much wind can dry them out, while stagnant air can lead to rot.
Also, avoid overcrowding your plants. Give each orchid enough space to breathe and receive adequate light. If you're using shelves or racks, make certain there's enough distance between each level. This allows airflow to reach all your orchids, promoting a healthy environment.
You might also want to rotate your orchids occasionally. This practice not only guarantees even exposure to light but also helps maintain consistent airflow.
Fertilize Appropriately
Fertilizing your orchids at the right time can make a significant difference in their health and blooming potential. To serve your orchids well, start by choosing a balanced fertilizer specifically designed for orchids. Look for one with a ratio of nitrogen, phosphorus, and potassium, such as 30-10-10 or 20-20-20, depending on your orchids' needs.
Timing is essential. During the growing season, which is typically spring and summer, feed your orchids every two to four weeks. Dilute the fertilizer to half the recommended strength, as orchids are sensitive to over-fertilization.
When autumn arrives, reduce feeding frequency, and in winter, pause completely to allow your orchids to rest.
Water your orchids thoroughly before applying fertilizer to prevent root burn. If your orchids are potted in bark or other coarse media, it's best to fertilize after watering, as this will help the nutrients absorb more effectively.
Inspect for Pests Regularly
When caring for your orchids, regular pest inspections are vital for their health.
You'll want to familiarize yourself with common pest types that can harm these delicate plants.
Using effective inspection techniques will help you catch any problems early, ensuring your orchids thrive.
Common Pest Types
Regularly inspecting your orchids for pests is essential, as even a few unwanted visitors can wreak havoc on your plants. Knowing what to look for can help you protect your orchids and guarantee they thrive. Common pests include aphids, mealybugs, and spider mites.
Aphids are small, soft-bodied insects that cluster on new growth. They suck the sap from your orchids, causing leaves to curl and yellow.
Mealybugs appear as white, cottony masses on leaves and stems, draining the plant's energy.
Spider mites, on the other hand, are tiny and often go unnoticed until they create fine webbing on your orchids. They thrive in dry conditions, so maintaining humidity can help deter them.
Scale insects also pose a threat; they attach themselves to stems and leaves, creating hard, protective shells.
Finally, fungus gnats can be bothersome, often found in the potting mix and feeding on roots.
Regular inspections allow you to catch these pests early and take action. By staying vigilant, you can guarantee a healthy environment for your orchids and share your blooming joy with others.
Effective Inspection Techniques
To keep your orchids thriving, effective inspection techniques are essential. Regularly checking your plants for pests not only helps maintain their health but also guarantees they continue to bring joy to others.
Start by examining the leaves, stems, and roots closely for any signs of trouble. Look for discolored spots, webbing, or sticky residue, which can indicate pest infestations.
Use a magnifying glass if needed, as some pests are tiny and easy to miss. Don't forget to inspect the underside of leaves, where pests often hide.
If you spot anything suspicious, act quickly. Isolate the affected plant to prevent the pests from spreading to your other orchids.
Keep a routine—inspect your orchids weekly to catch issues early. Document any findings to track patterns over time. This way, you'll develop a keen eye for potential problems.
Also, encourage fellow orchid enthusiasts to adopt similar practices. Sharing your knowledge not only helps their plants but strengthens the community.
Recognize Signs of Stress

Amidst the beauty of your orchid, subtle signs of stress can often go unnoticed until they escalate into serious issues. You need to be vigilant in observing your plant's behavior. If you notice yellowing leaves, it might indicate overwatering or insufficient light. Don't ignore these signs; they're your orchid's way of communicating its discomfort.
Wilting or drooping leaves suggest that your orchid may be thirsty or struggling with temperature fluctuations. Check your watering schedule and guarantee your plant isn't exposed to drafts or extreme heat.
If you spot black or brown spots on the leaves, that could point to fungal infections or pests. Take immediate action to identify the root cause and treat it effectively.
Additionally, if your orchid isn't producing new growth or blooms, it could be stressed due to nutrient deficiencies or poor lighting conditions. Adjusting your care routine can make a significant difference.
Repot When Necessary
Repotting your orchid is essential whenever you notice its roots outgrowing their container or the potting medium breaking down. These signs indicate that your orchid isn't getting the nutrients it needs to thrive.
By repotting, you're not just giving your plant a new home; you're ensuring it has the best chance for health and beauty.
When you decide to repot, choose a suitable orchid potting mix that allows for proper drainage and air circulation.
Carefully remove your orchid from its current pot, gently untangling any roots that may be stuck. This is a great opportunity to trim away any dead or damaged roots, promoting new growth.
After placing your orchid in its new pot, make sure to fill in around the roots with fresh potting medium.
Water lightly to help settle the mix, but don't overdo it. Remember, the goal is to create a supportive environment for your orchid to flourish.
Regular repotting not only prevents potential disasters but also showcases your dedication to nurturing these beautiful plants.
Your efforts will reward you with vibrant blooms and the joy of seeing your orchid thrive.
Frequently Asked Questions
Can I Use Regular Houseplant Fertilizer for My Orchids?
You can use regular houseplant fertilizer for your orchids, but it's best to choose a balanced orchid-specific formula. These fertilizers provide the right nutrients, ensuring your orchids thrive and bloom beautifully. Just follow the recommended dosage!
How Often Should I Check My Orchids for Pests?
You should check your orchids for pests at least once a week. Regular inspections help you catch any infestations early, ensuring your plants stay healthy and vibrant while you nurture their growth and beauty.
What Temperature Range Is Ideal for Orchids?
Orchids thrive best in temperatures between 65°F and 75°F during the day and 60°F to 65°F at night. Keeping them within this range helps guarantee their health and vibrant blooms, so monitor your environment closely.
Can I Grow Orchids Outside Year-Round?
You can grow orchids outside year-round, but it depends on your local climate. Make certain temperatures stay between 60°F and 80°F, and protect them from extreme weather. Providing proper care will help them thrive.
How Long Can Orchids Survive Without Water?
Orchids can typically survive without water for about one to two weeks, depending on the species and environmental conditions. To keep them thriving, you'll want to monitor their moisture levels closely and adjust care accordingly.
Conclusion
By following these guidelines, you can prevent orchid disasters before they start. Understand your specific orchid species and provide the right potting medium, light, and water conditions. Keep an eye on humidity levels and fertilize appropriately. Regularly check for pests and recognize signs of stress early. Remember, repotting when necessary is essential for your orchid's health. With a little care and attention, your orchids will thrive and reward you with beautiful blooms.